Authenticate with your account user name and password.

This tutorial provides step-by-step instructions for activating a line of service for a single device in a Private Network configuration using the Verizon ThingSpace Platform Wireless Network Services. It is not intended to cover all aspects of the activation process. It only describes the basic procedure for accomplishing a typical activation.
The example screen shots in this tutorial depict the SoapUI development tool, and assume that the Verizon M2M API WSDLs have already been loaded into a project. You can use the development tool of your choice.
The primary steps required to activate a line of service are:
Your application must authenticate with the Verizon ThingSpace Platform before it can issue any requests.
Authenticate with your account user name and password.
The response is a synchronous message which includes a SessionToken element.
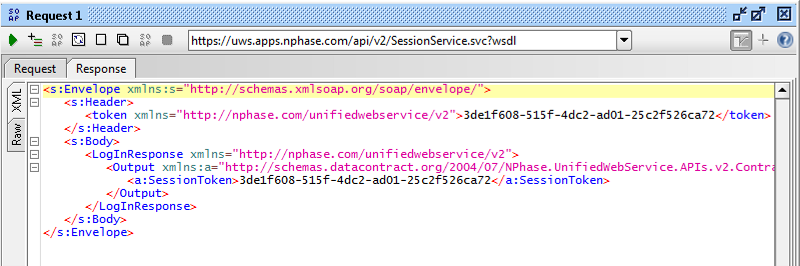
You must include this token in the header of every subsequent API request in the current session. Use this format for the token in request headers:
<soapenv:Envelope xmlns:soapenv="http://schemas.xmlsoap.org/soap/envelope/"
  xmlns:v2="http://nphase.com/unifiedwebservice/v2"
  xmlns:nph="http://schemas.datacontract.org/2004/07/NPhase.UnifiedWebService.APIs.v2.Contract.SessionService">
 <soapenv:Header>
   <v2:token>token_goes_here</token>
 </soapenv:Header>
The session token expires after 20 minutes with no requests.
In the Verizon ThingSpace Platform, activation feedback is provided asynchronously, in a callback message. You'll receive an immediate (synchronous) response indicating whether your request was accepted, but the ThingSpace Platform sends the activation details -- including whether activation succeeded or failed -- in an asynchronous callback response. You must create a callback service before sending activation requests in order to receive these responses.
There are two tutorials showing how to set up a callback service. Pick the one that most closely matches your environment:
You can create callback services for several different types of requests. For activation requests, you must create a CarrierService callback service.
A Service Plan Code is a mandatory parameter that you must provide in any activation request. Service Plan Codes are assigned to your account during customer on-boarding.
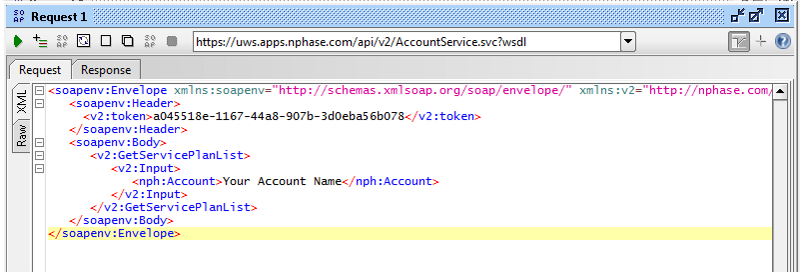
Issue an AccountService/GetServicePlanList request to obtain a list of service plans assigned to your account.
Make note of the Service Plan Codes assigned to your account. The example response below contains two Service Plan Codes: T Plan 1 and T Plan 2.
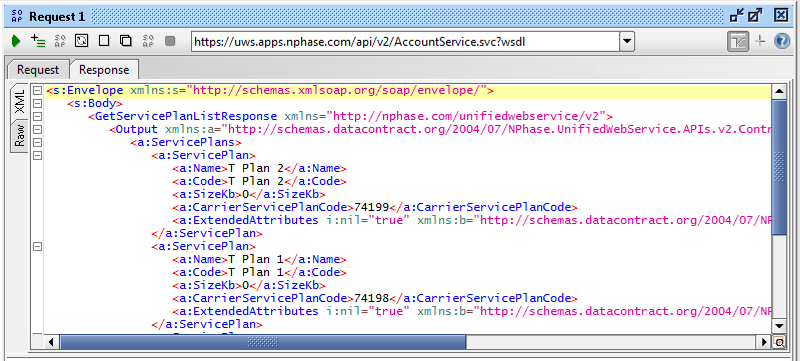
Note:You cannot perform any activations with Service Plan Codes "M2M" or "M2M_CPN". You must use a Service Plan Code that has been assigned to your account.
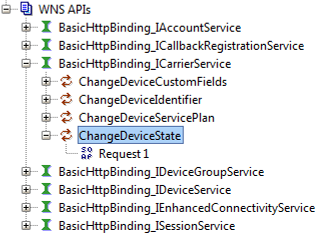
You'll use the CarrierService/ChangeDeviceState API to activate a device. This API offers several service provisioning options, including activating up to 10,000 devices in a single call. This tutorial only covers the mandatory fields for activating a single line of service.
Locate CarrierService/ChangeDeviceState in the WSDL:
Provide values for the required parameters listed in the table below. If your development tool shows you any optional parameters, you can delete them.
| Parameter | Description |
|---|---|
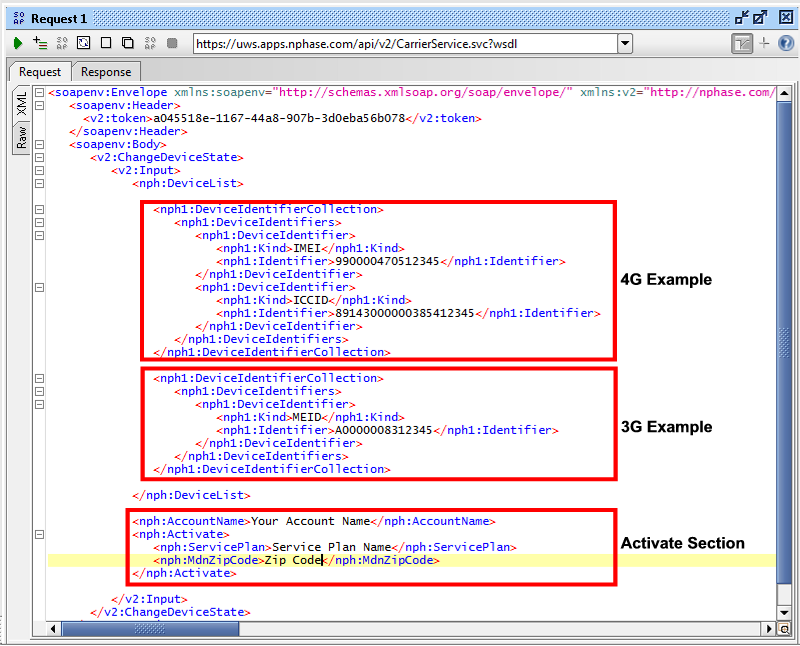
| Device Identifier | For 2G or 3G devices: Provide the ESN or MEID. For 4G devices: Provide the IMEI and ICCID. (Pay special attention to the way these identifiers are grouped in the example below.) |
| Activate | A key word and the specified operation. Delete all other operations such as suspend, restore, and deactivate. |
| AccountName | The name of the billing account for which a line of service is being activated. |
| ServicePlan | The Service Plan Code to be associated with the line of service when it is activated. |
| MDNZipCode | Zip code associated with the line of service. Specify the zip code of the primary location where the line of service will be used. |
Here is an example of an activation request:
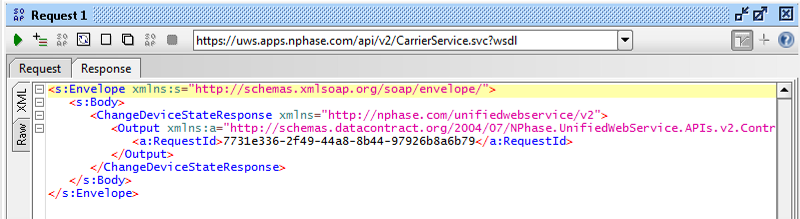
And a sample response:
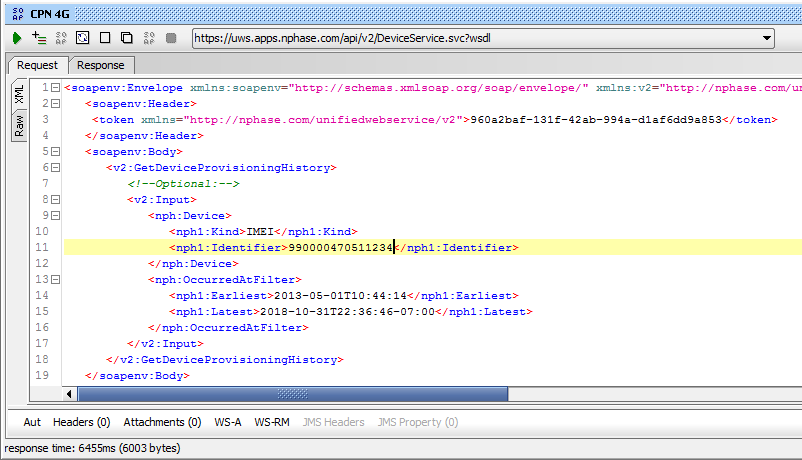
You can verify the results of an activation by viewing the provisioning history for a device. In the Verizon ThingSpace Platform, activation feedback is also provided asynchronously, in a callback message. You must create a callback Service to receive feedback regarding activations, as described in Set up and register a callback service for CarrierService APIs.
Call DeviceService/GetDeviceProvisioningHistory with the following parameters:
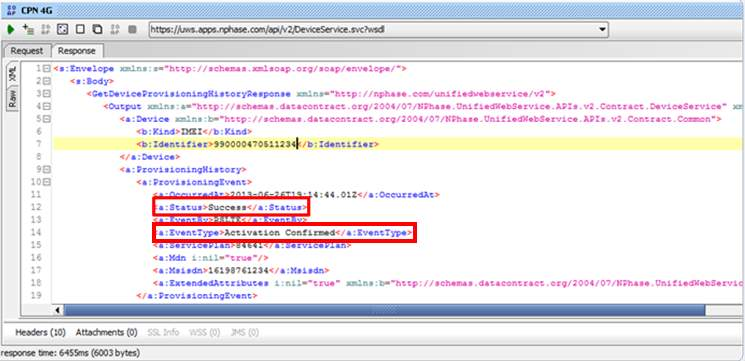
Look for a Status of "Success" and an EventType of "ActivationConfirmed."
For a 2G/3G device to use its new line of service, it must go through the process of Over The Air Service Programming (OTASP). Each device is different in how it accomplishes this task. Please refer to the device vendor's documentation. Some devices will automatically perform OTASP when you power them up for the first time; other devices provide a GUI interface that must be used to perform OTASP: and still other devices require the use of AT commands.
To prepare your 2G/3G device for OTASP, ensure the following:
Once OTASP is initiated, it may take up to one hour for the device to be connected to the network. When the device is connected, it is ready for use.
You can check the device's connected status with DeviceService/GetDevicelist, as depicted below:
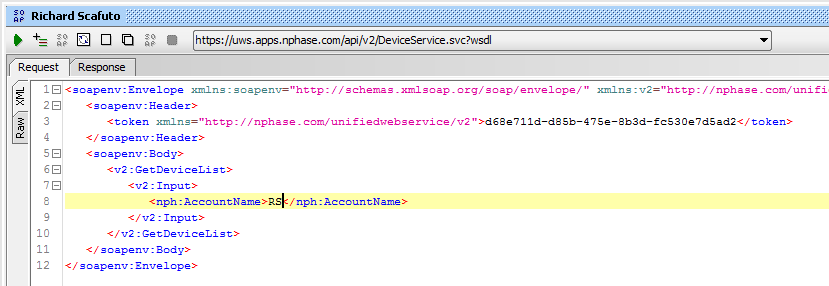
4G lines of service configured on a private network must support OTA APN Change because the default APN is for the default Internet APN. After activation. you must wait for a period of up to one hour for your device to accept the new private network APN and be ready for use. Until the device accepts the new private network APN. Attempting to connect will result in authentication failure.
You can check a 4G device's connected status with DeviceService/GetDevicelist. See the previous section, Prepare a 2G or 3G Device for Connection, for an example.